To hide faces in a video, you typically need to install an editing program and manually add mosaics frame by frame in each section where faces appear. If the video includes many people or constant movement, this can take much longer.
With VideoMasker, simply open the website and select a video. AI finds and automatically masks faces for you. We’ve organized the process in order, from opening a video to saving it, so that first-time users can follow along easily.
Before You Begin
VideoMasker runs directly in your browser without requiring a separate program installation. However, because video processing takes place on your computer, processing speeds may vary depending on the browser. Please check the following two items before you begin.
- Browser: Chrome 94 or later or Edge 94 or later is recommended.
- File formats: You can open MP4, MOV, AVI, and WebM files.
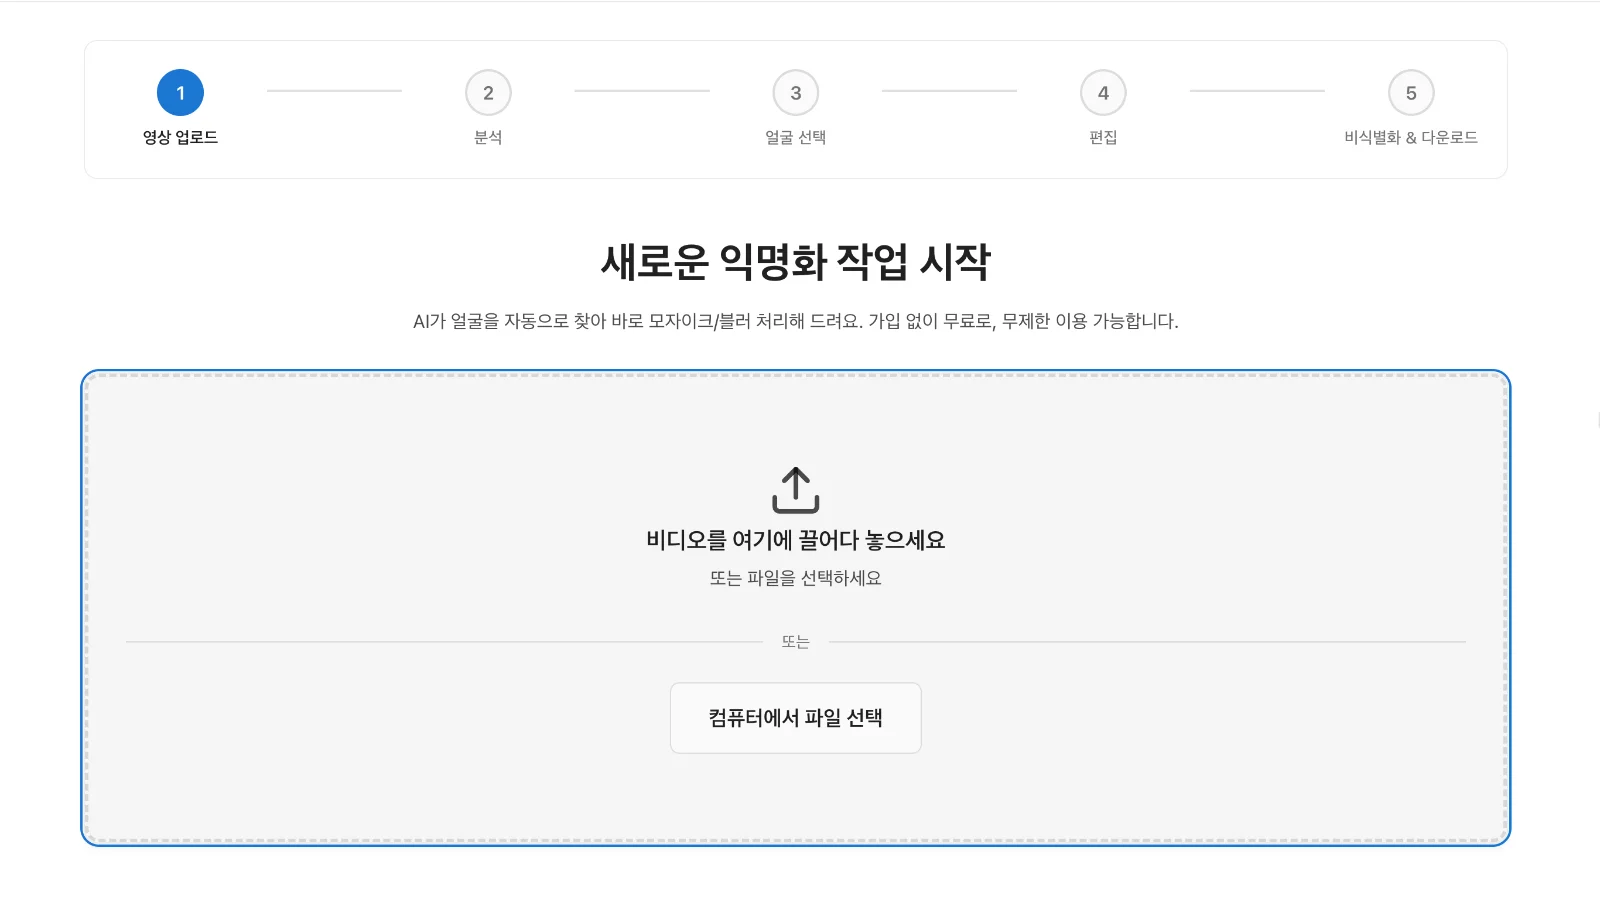
1. Open a Video
Go to VideoMasker and select the video file you want to mosaic. When you select a file, it is opened directly in your browser from your computer rather than uploaded to a server, so you do not have to wait for a lengthy upload even when working with large videos.
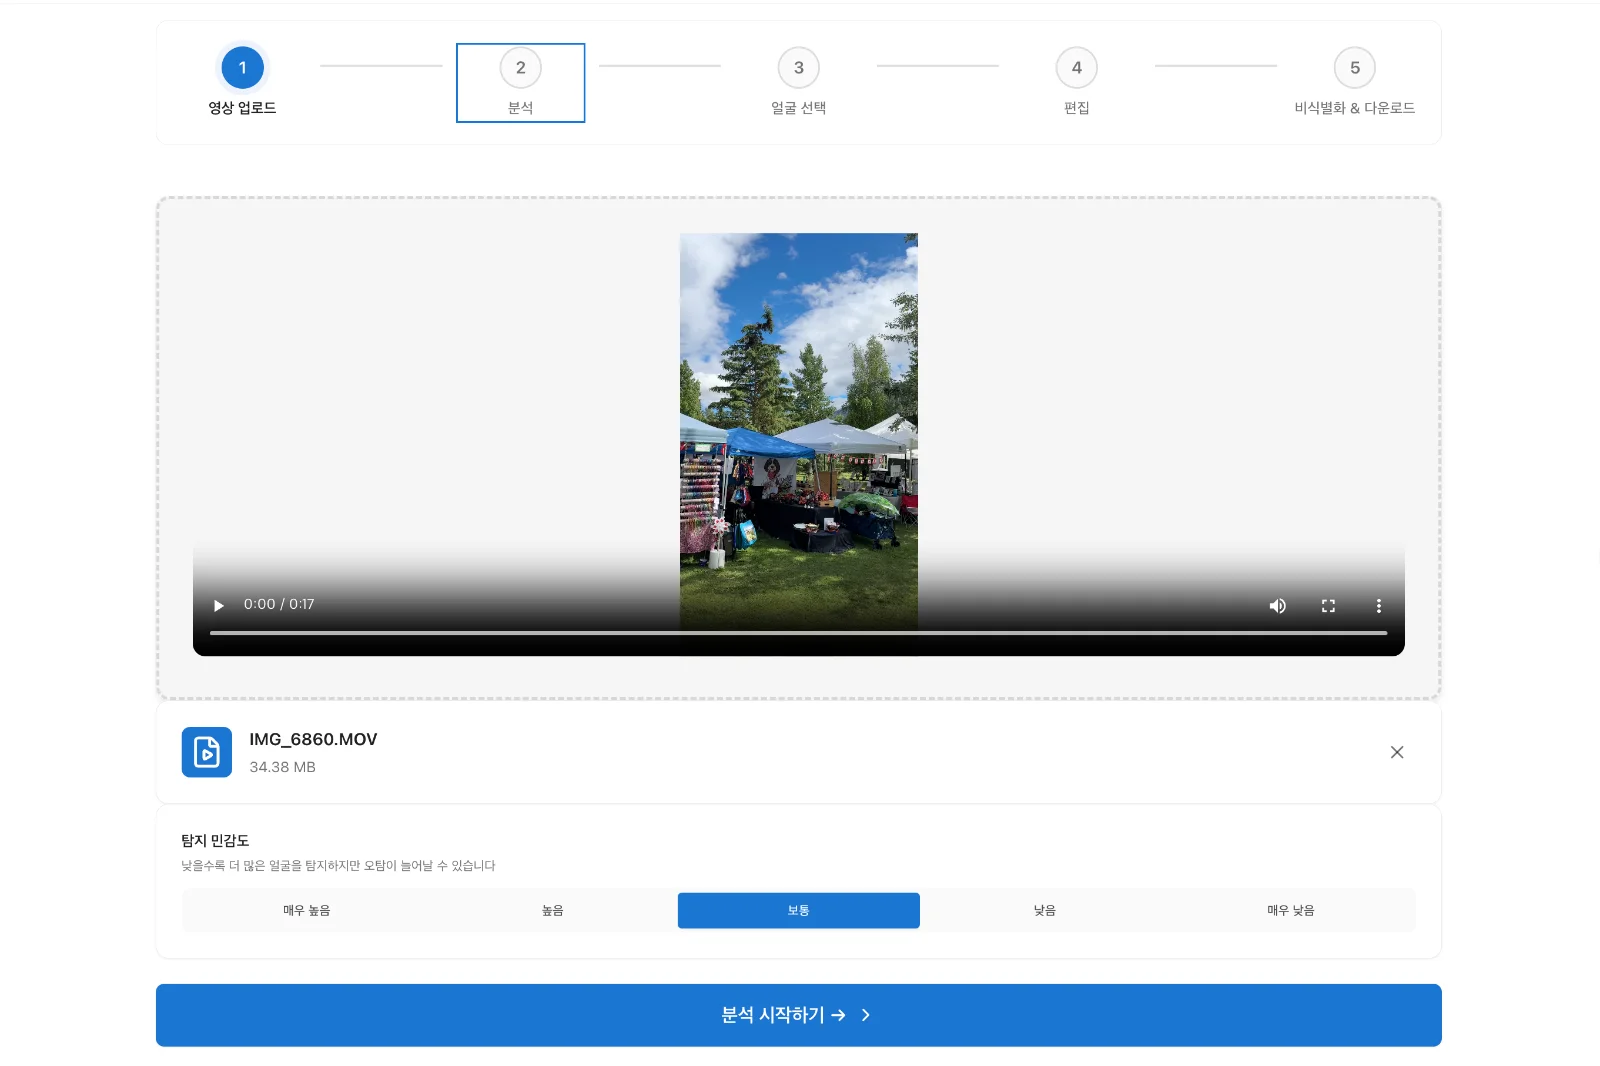
2. Automatically Analyze Faces
When you open a video, AI finds faces throughout the video and tracks them as people move. It also creates previewable scenes on the timeline during the analysis, so you can check the results as soon as the analysis is complete.
Processing time varies depending on the video length and resolution. A one-minute 720p video typically takes about 1~2 minutes.
3. Choose Which Faces to Hide
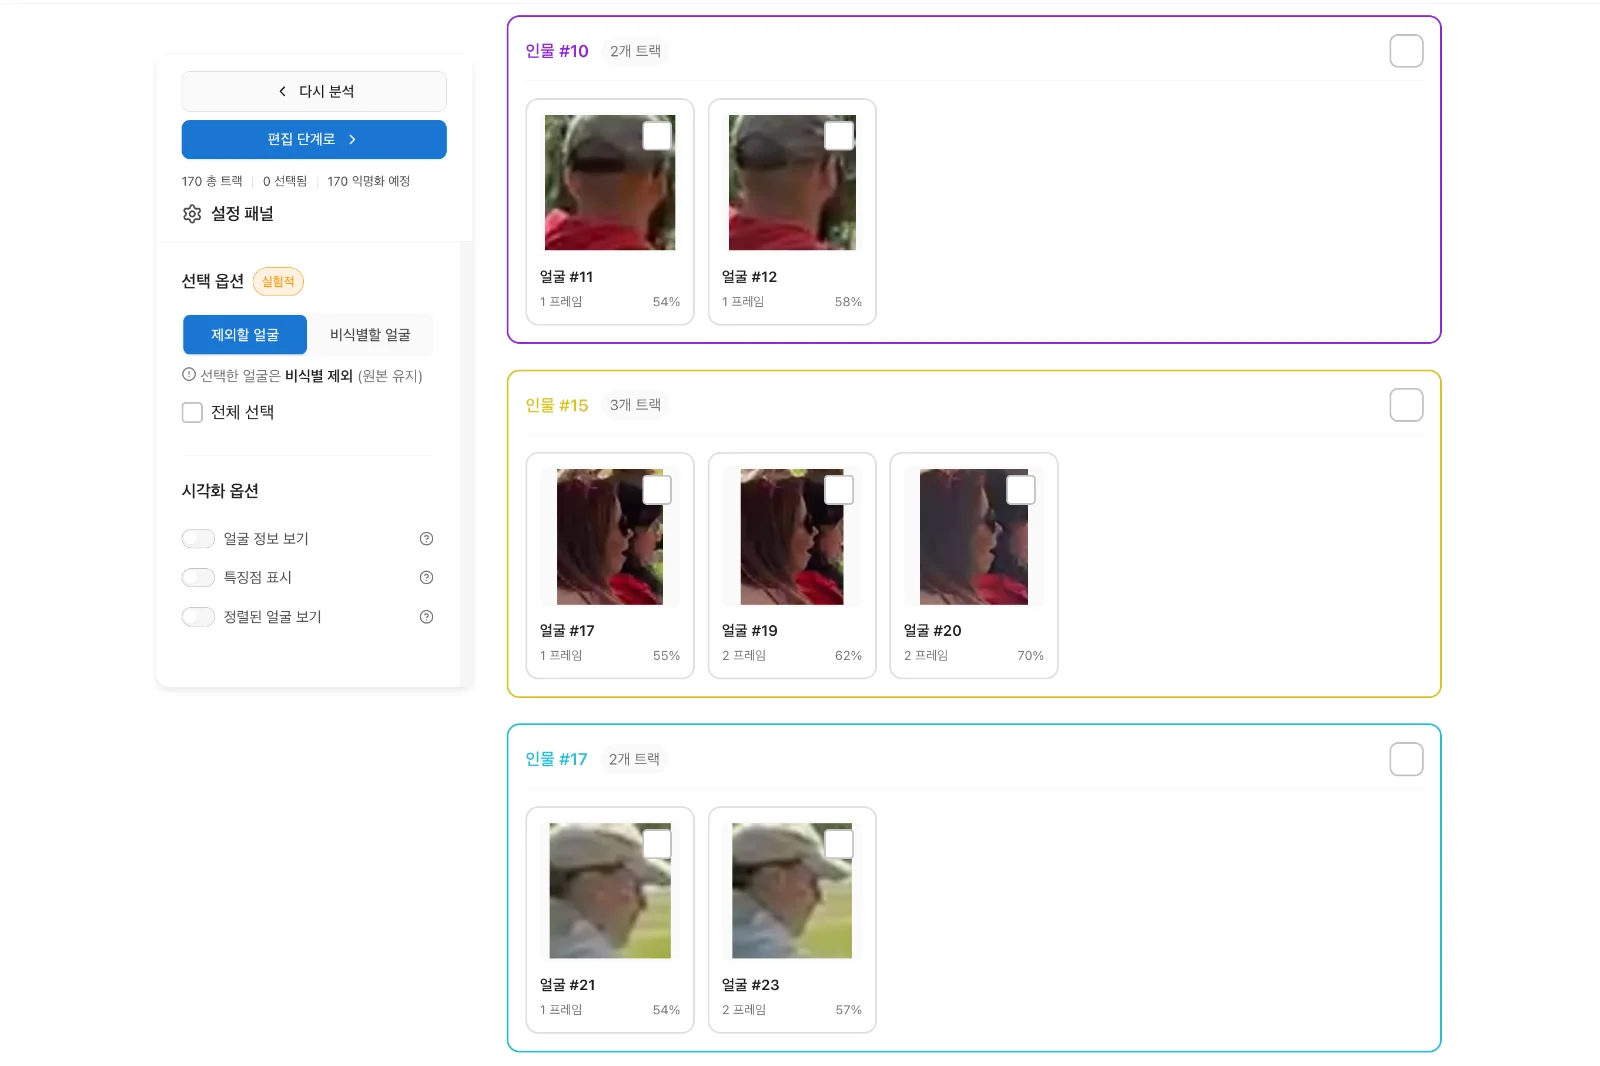
Once the analysis is complete, you can view the list of faces found in the video. By default, all detected faces are hidden. With the Pro plan, you can choose which faces to hide and which ones to leave visible.
For example, in an interview video, you can leave the interviewee’s face visible while hiding only the faces of people passing by in the background.
4. Refine Masks on the Timeline
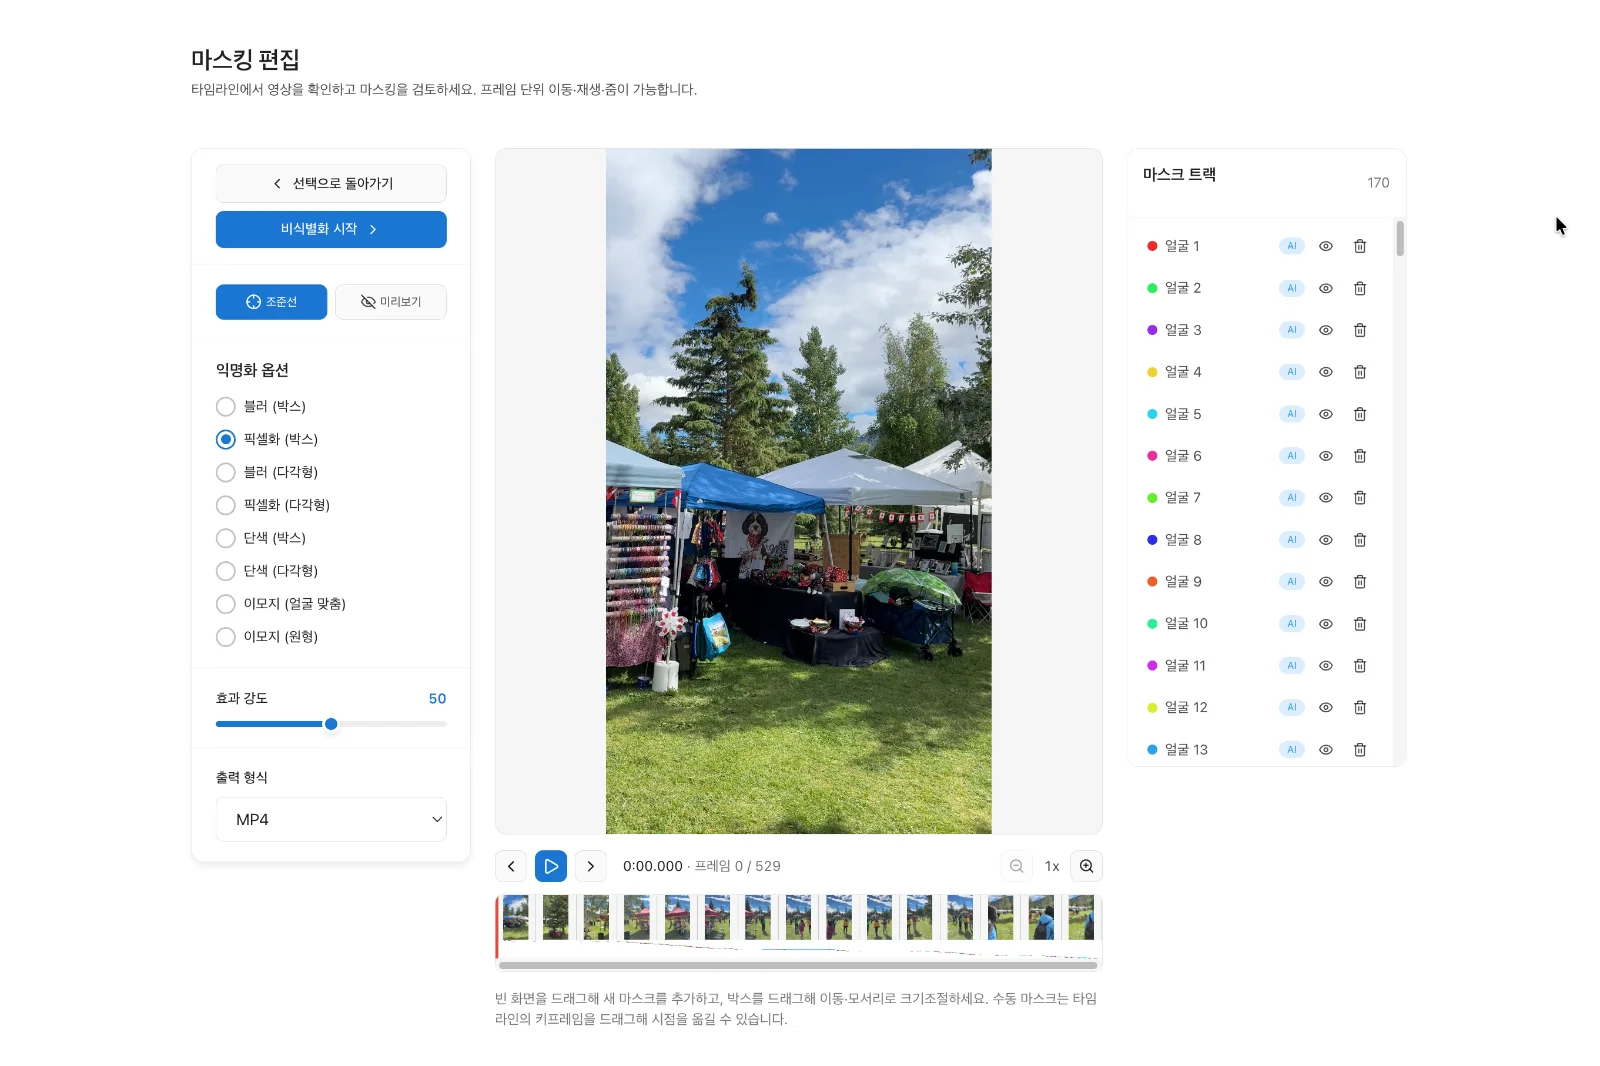
You can review the automatically applied masks scene by scene on the timeline and refine them as needed.
- Move and resize masks
- Delete masks from areas that do not need to be hidden
- Add masks manually to areas you want to hide additionally
If there are areas you want to hide separately, such as name tags or monitor screens, you can add masks at this stage. The mask editing feature is available after logging in.
5. Choose an Effect and Save
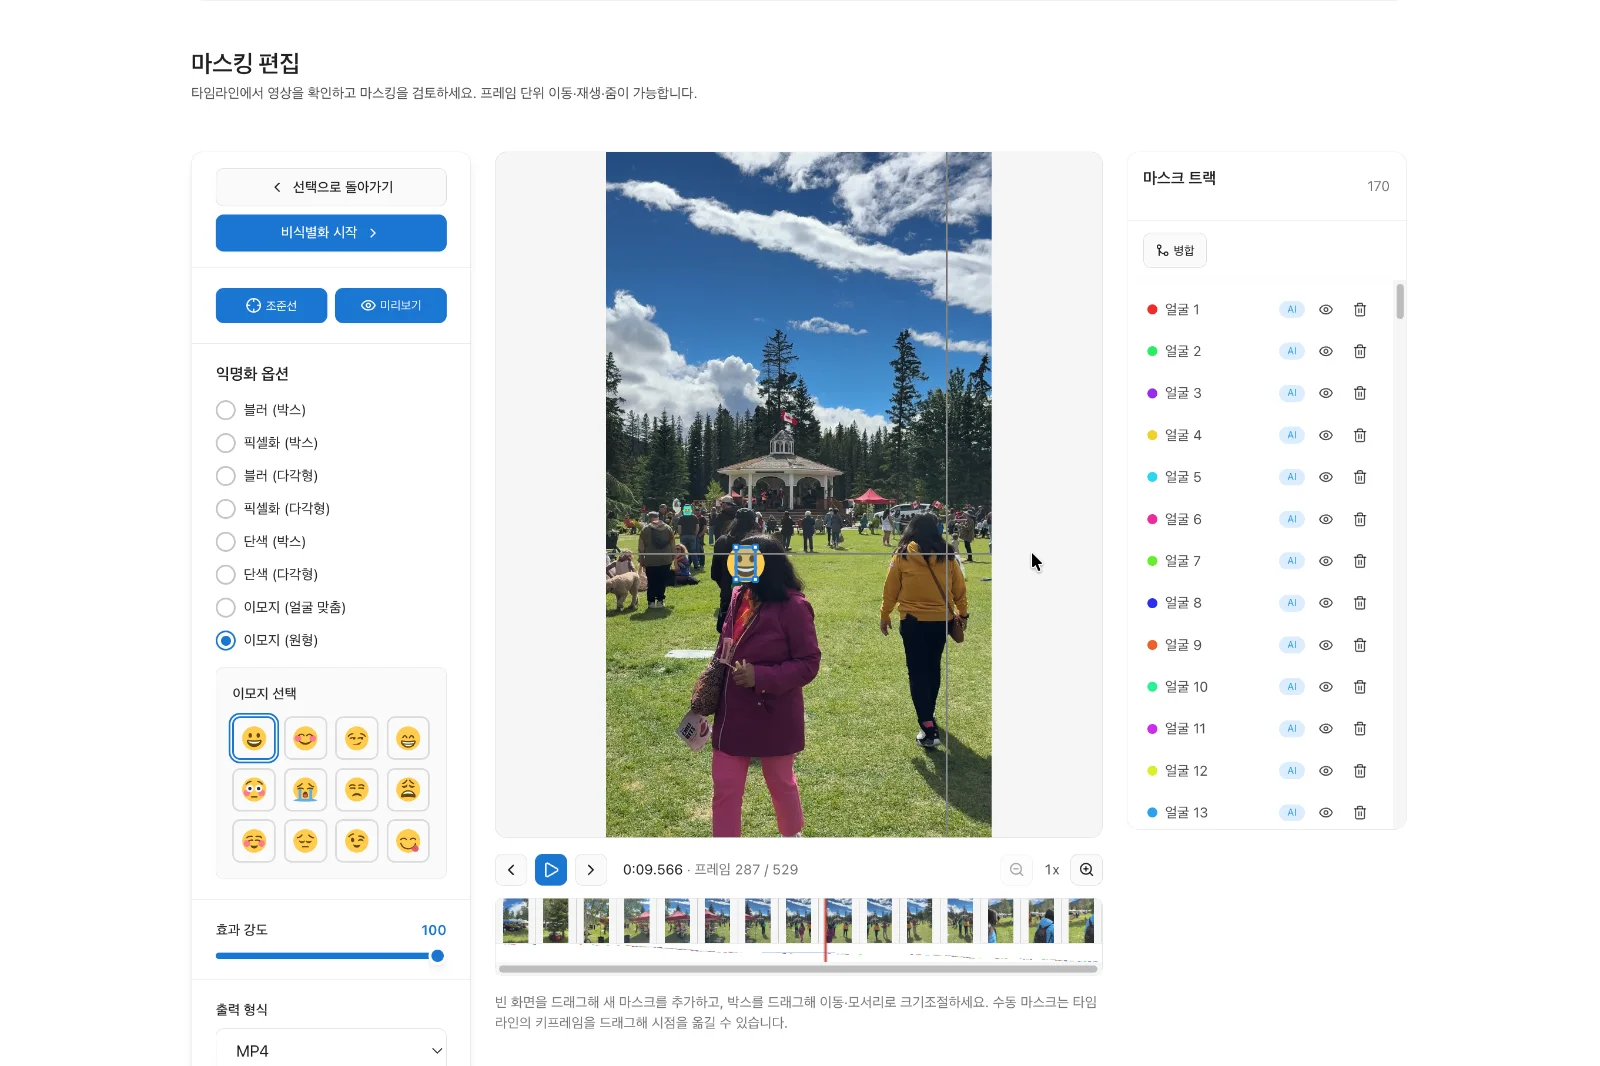
Finally, choose a mosaic effect, adjust its intensity, and save the video. Pixelation is available for free, while the blur effect is available with the Pro plan.
When you save the video, all selected faces and edited masks are applied, while the original audio is preserved. The finished video can be downloaded as an MP4 or WebM file.
Get Started Now
You can process your first video right away by visiting the website without installing anything. If you have a video that needs mosaicing, open it in VideoMasker now.